[st-kaiwa1]人気ブログを見てみると、記事一覧の上にバナー風のボタンを表示していることが多いような…[/st-kaiwa1]
と思い、当ブログでも設置してみました。(現在は Affinger を使用しています)
[st-minihukidashi bgcolor=”#37beb0″ color=”#fff” margin=”0″] この記事で分かること [/st-minihukidashi]
[st-mybox title=”” webicon=”st-svg-check-circle” color=”” bordercolor=”#37beb0″ bgcolor=”” borderwidth=”2″ borderradius=”5″ titleweight=”bold”]
- テーマ「Sango」で記事一覧の上にバナー風のボタンを設置する方法
[/st-mybox]
当ブログで利用していた WordPress テーマ「Sango」では、記事一覧の上に「ヘッダーアイキャッチ」をカスタマイズから設定できるのですが、あくまで紹介できるのはリンクを1つだけ。
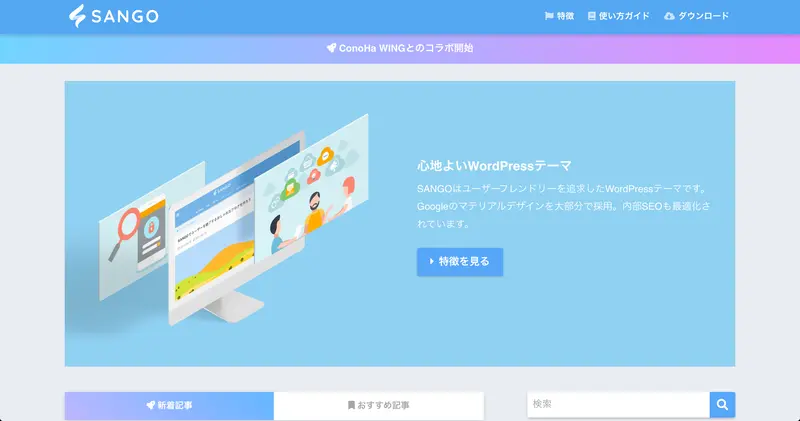
しかも、ヘッダーに大きい画像を表示させることになるので、最低でも3つのバナーを表示させたいと思ってデザインを変更してみました。
個人的な備忘録ですが、もし興味がある人はこれから紹介する方法を参考にしてみてください。
[st-kaiwa2]PHP を色々と触るので、しっかりとバックアップを取ってから作業をしてくださいね。[/st-kaiwa2]
それでは、Sango で「バナーのようなボタン」を新着記事の上に表示する方法を解説します。
バナーのようなボタンを表示させるための準備
新着記事の上にバナーのようなボタンを表示するには、以下を利用しています。
[st-minihukidashi bgcolor=”#37beb0″ color=”#fff” margin=”0″] バナーを表示するのに使ったもの [/st-minihukidashi]
[st-mybox title=”” webicon=”st-svg-check-circle” color=”” bordercolor=”#37beb0″ bgcolor=”” borderwidth=”2″ borderradius=”5″ titleweight=”bold”]
- Sango の横並び3列にするショートコード
- バナーに使う画像を3つ
- ホバーした時にアニメーションさせる CSS
[/st-mybox]
これらを使って、index.php に書き込んでデザインを変更していきます。
Sango の横並び 3 列にするショートコード
Sango には便利なショートコードが用意されていて、今回はその中の「横並び 3 列」を利用しました。
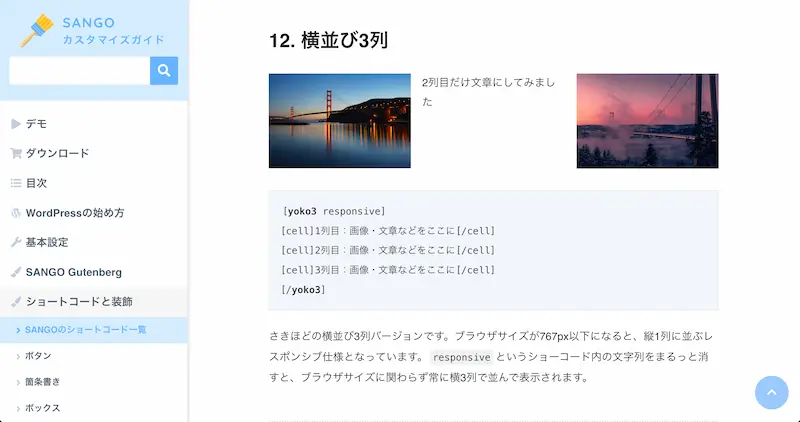
ブラウザサイズが 767px 以下になると縦1列に並ぶレスポンシブ仕様となっているので、スマホ表示でも安心して利用できます。
バナーに使う画像を3つ
「横並び3列」のショートコードを使うので、当然ながらバナーに使う画像を 3 つ用意しました。
ホバーする時のアニメーションとの兼ね合いもあって、
[st-mybox title=”” webicon=”” color=”#333333″ bordercolor=”#37beb0″ bgcolor=”#fcfcfc” borderwidth=”2″ borderradius=”5″ titleweight=”bold” fontsize=””]
560px × 220px
[/st-mybox]
の画像を使用しました。
スマホ表示にした時もちょうど良い感じがするので、同じような大きさの画像を作成しておくと綺麗に表示されると思います。
画像の作成には Canva を利用していて、初めてそのサービスを聞いたという人は 無料デザインツールを探してるなら【Canva】の記事でサービスの内容を解説しています。
ホバーした時にアニメーションさせる CSS
Sango では、一覧表示されているカードにカーソルをホバーさせると、フワッと浮き上がるアニメーションが採用されています。
そのアニメーションを使っても良かったのですが、あえて別の動きを使ってみました。
今回お世話になったのは、PhotoshopVIP さんで紹介されているホバーエフェクト。
【参考記事】HTML/CSSで実装できる!今どきデザインのホバーエフェクト30個まとめ
その中の「マウスホバーで、タイトルをラインを交差させながら表示。」をそのまま使っています。
ただ、CSS の一部は数字などを少し調整しています。
調整した後は、下記のようにしました。
@import url(https://fonts.googleapis.com/css?family=Raleway:400,700); | |
.snip1445 { | |
font-family: 'Raleway', Arial, sans-serif; | |
position: relative; | |
overflow: hidden; | |
margin: 0px; | |
min-width: 230px; | |
max-width: 500px; | |
width: 100%; | |
color: #ffffff; | |
text-align: center; | |
font-size: 16px; | |
background-color: #000000; | |
} | |
.snip1445 *, | |
.snip1445 *:before, | |
.snip1445 *:after { | |
-webkit-box-sizing: border-box; | |
box-sizing: border-box; | |
-webkit-transition: all 0.55s ease; | |
transition: all 0.55s ease; | |
} | |
.snip1445 img { | |
max-width: 100%; | |
backface-visibility: hidden; | |
vertical-align: top; | |
} | |
.snip1445 figcaption { | |
position: absolute; | |
bottom: 25px; | |
right: 25px; | |
padding: 5px 10px 10px; | |
} | |
.snip1445 figcaption:before, | |
.snip1445 figcaption:after { | |
height: 2px; | |
width: 400px; | |
position: absolute; | |
content: ''; | |
background-color: #ffffff; | |
} | |
.snip1445 figcaption:before { | |
top: 0; | |
left: 0; | |
-webkit-transform: translateX(100%); | |
transform: translateX(100%); | |
} | |
.snip1445 figcaption:after { | |
bottom: 0; | |
right: 0; | |
-webkit-transform: translateX(-100%); | |
transform: translateX(-100%); | |
} | |
.snip1445 figcaption div:before, | |
.snip1445 figcaption div:after { | |
width: 2px; | |
height: 300px; | |
position: absolute; | |
content: ''; | |
background-color: #ffffff; | |
} | |
.snip1445 figcaption div:before { | |
top: 0; | |
left: 0; | |
-webkit-transform: translateY(100%); | |
transform: translateY(100%); | |
} | |
.snip1445 figcaption div:after { | |
bottom: 0; | |
right: 0; | |
-webkit-transform: translateY(-100%); | |
transform: translateY(-100%); | |
} | |
.snip1445 h2, | |
.snip1445 h4 { | |
margin: 0; | |
text-transform: uppercase; | |
} | |
.snip1445 h2 { | |
font-weight: 400; | |
} | |
.snip1445 h4 { | |
display: block; | |
font-weight: 700; | |
background-color: #ffffff; | |
padding: 5px 10px; | |
color: #000000; | |
} | |
.snip1445 a { | |
position: absolute; | |
top: 0; | |
bottom: 0; | |
left: 0; | |
right: 0; | |
} | |
.snip1445:hover img, | |
.snip1445.hover img { | |
zoom: 1; | |
filter: alpha(opacity=50); | |
-webkit-opacity: 0.5; | |
opacity: 0.5; | |
} | |
.snip1445:hover figcaption:before, | |
.snip1445.hover figcaption:before, | |
.snip1445:hover figcaption:after, | |
.snip1445.hover figcaption:after, | |
.snip1445:hover figcaption div:before, | |
.snip1445.hover figcaption div:before, | |
.snip1445:hover figcaption div:after, | |
.snip1445.hover figcaption div:after { | |
-webkit-transform: translate(0, 0); | |
transform: translate(0, 0); | |
} | |
.snip1445:hover figcaption:before, | |
.snip1445.hover figcaption:before, | |
.snip1445:hover figcaption:after, | |
.snip1445.hover figcaption:after { | |
-webkit-transition-delay: 0.15s; | |
transition-delay: 0.15s; | |
} |
新着記事の上にバナーを設置する作業手順
必要なものを 3 つ紹介したので、さっそく index.php の作業に移ります。
index.php に埋め込むコード
今回は「マウスホバーで、タイトルをラインを交差させながら表示。」をそのまま使っているので、表示する時の HTML もそのまま参考にして使っています。
そして、index.php に詰め込むコードは以下の通り。
<div class="wrap cf"> | |
<?php echo do_shortcode('[center][yoko3 responsive][cell]<figure class="snip1445"> | |
<img src="左バナーに設置する画像"> | |
<figcaption> | |
<div> | |
<h2>メインタイトル</h2> | |
<h4>サブタイトル</h4> | |
</div> | |
</figcaption> | |
<a href="左バナーから飛ばす URL"></a> | |
</figure> | |
[/cell][cell]<figure class="snip1445"> | |
<img src="中央バナーの画像"> | |
<figcaption> | |
<div> | |
<h2>メインタイトル</h2> | |
<h4>サブタイトル</h4> | |
</div> | |
</figcaption> | |
<a href="中央バナーから飛ばす URL"></a> | |
</figure>[/cell][cell]<figure class="snip1445"> | |
<img src="右バナーの画像"> | |
<figcaption> | |
<div> | |
<h2>メインタイトル</h2> | |
<h4>サブタイトル</h4> | |
</div> | |
</figcaption> | |
<a href="右バナーから飛ばす URL"></a> | |
</figure>[/cell][/yoko3][/center]'); ?></div> |
コードの内訳を少し解説
Sango のテーマで使われている CSS をそのまま利用して、記事の枠組みを調整しています。
[st-mybox title=”” webicon=”” color=”#333333″ bordercolor=”#37beb0″ bgcolor=”#fcfcfc” borderwidth=”2″ borderradius=”5″ titleweight=”bold” fontsize=””]
<div class=”wrap cf”></div>
[/st-mybox]
そして、ショートコードをそのまま PHP で使っても反映しないので、「横並び3列」を下記のコードで囲っています。
[st-mybox title=”” webicon=”” color=”#333333″ bordercolor=”#37beb0″ bgcolor=”#fcfcfc” borderwidth=”2″ borderradius=”5″ titleweight=”bold” fontsize=””]
<?php echo do_shortcode(‘[ショートコード]’); ?>
[/st-mybox]
index.php にコードを埋め込む
index.php を編集するので、もし子テーマを使っていない人はまず作りましょう。
そして、子テーマに index.php のファイルを複製してから作業に入ります。
準備ができたら、下記の箇所に先程のコードを入れます。
<?php get_header(); ?> | |
<?php if(is_front_page()) get_template_part('parts/home/featured-header'); ?> | |
[先程のコードをここに入力] | |
<div id="content"> | |
<div id="inner-content" class="wrap cf"> | |
<main id="main" class="m-all t-2of3 d-5of7 cf"> | |
<?php | |
if(is_active_sidebar( 'home_top' )) dynamic_sidebar( 'home_top' ); | |
if(get_option('activate_tab')) { | |
// タブありの記事一覧 | |
get_template_part('parts/home/post-tab'); | |
} else { | |
// タブなしの記事一覧 | |
get_template_part('parts/post-grid'); | |
} | |
if(is_active_sidebar( 'home_bottom' )) dynamic_sidebar( 'home_bottom' ); | |
?> | |
</main> |
すると、こんな感じになっているはずです。
<?php get_header(); ?> | |
<?php if(is_front_page()) get_template_part('parts/home/featured-header'); ?> | |
<div class="wrap cf"> | |
<?php echo do_shortcode('[center][yoko3 responsive][cell]<figure class="snip1445"> | |
<img src="左バナーに設置する画像"> | |
<figcaption> | |
<div> | |
<h2>メインタイトル</h2> | |
<h4>サブタイトル</h4> | |
</div> | |
</figcaption> | |
<a href="左バナーから飛ばす URL"></a> | |
</figure> | |
[/cell][cell]<figure class="snip1445"> | |
<img src="中央バナーの画像"> | |
<figcaption> | |
<div> | |
<h2>メインタイトル</h2> | |
<h4>サブタイトル</h4> | |
</div> | |
</figcaption> | |
<a href="中央バナーから飛ばす URL"></a> | |
</figure>[/cell][cell]<figure class="snip1445"> | |
<img src="右バナーの画像"> | |
<figcaption> | |
<div> | |
<h2>メインタイトル</h2> | |
<h4>サブタイトル</h4> | |
</div> | |
</figcaption> | |
<a href="右バナーから飛ばす URL"></a> | |
</figure>[/cell][/yoko3][/center]'); ?></div> | |
<div id="content"> | |
<div id="inner-content" class="wrap cf"> | |
<main id="main" class="m-all t-2of3 d-5of7 cf"> | |
<?php | |
if(is_active_sidebar( 'home_top' )) dynamic_sidebar( 'home_top' ); | |
if(get_option('activate_tab')) { | |
// タブありの記事一覧 | |
get_template_part('parts/home/post-tab'); | |
} else { | |
// タブなしの記事一覧 | |
get_template_part('parts/post-grid'); | |
} | |
if(is_active_sidebar( 'home_bottom' )) dynamic_sidebar( 'home_bottom' ); | |
?> | |
</main> |
これで更新して、特にデザインに崩れなどがなければ完了です。
さいごに
新着記事の上にバナーを表示することで、どれだけの効果があるのかは正直分かりません。笑
[st-kaiwa2]ただただ、人気ブログのようにバナーを表示してみたかったというだけです。[/st-kaiwa2]
Sango 利用者で同じように表示させたいと思っていた人がいれば、参考にしてみてくださいね。